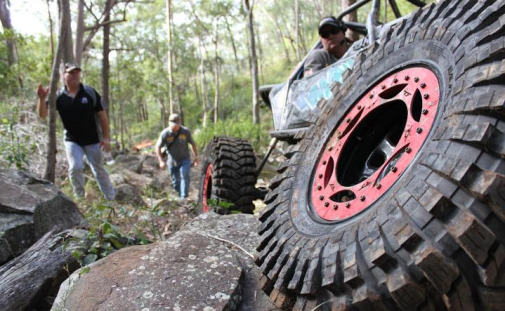
Weld on Beadlock Kit Installation Instructions
The inner ring is slightly smaller so it sits inside the outer lip of the rim, instead of on top of it. I like this for a few reasons:
1. Makes it easy to weld and get an airtight bead. (since the gap is filled with weld)
2. Doesn't change the width of the rim
3. Its just easier to work with.
What you will need:
1. basic tools (tire levers, hammer , spanners, sockets, ratchet, torque wrench)
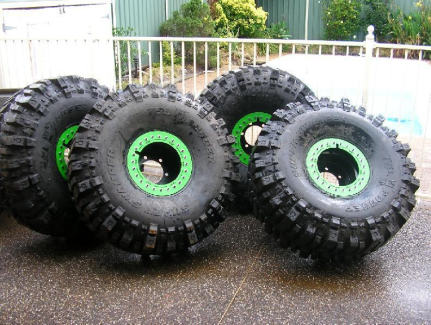
2. 24 bolts (M8 x 50) per rim, and 2 flat washers (per bolt) and Nyloc nuts.
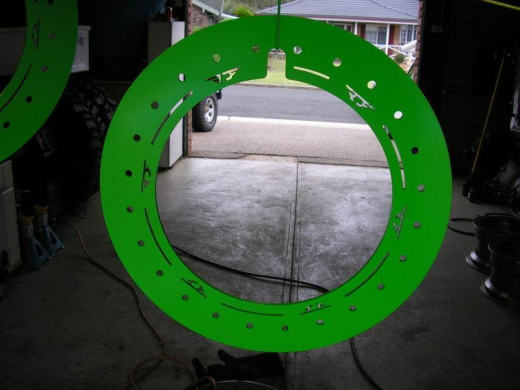
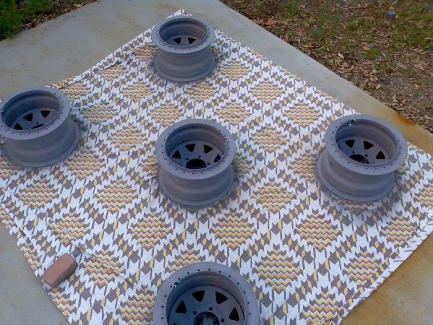
The first thing I did was prime and paint the outer rings. NOTE: The logo should read DFI not back to front!
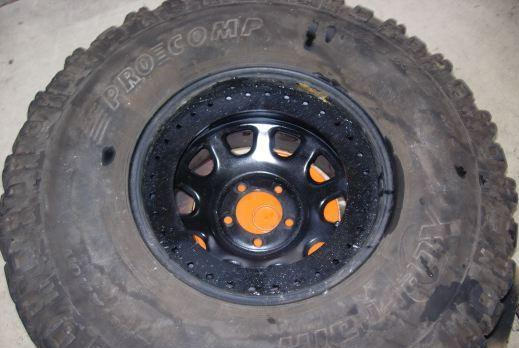
With that done, onto the real work. the first thing you need to do is remove the tire from the wheel. (if you already have them mounted of course) to do this I removed the valve stem and let the air out of the tires, then I used tire levers and a big hammer to break the bead. With a little soapy water (alot actually) a couple of go’s, I got the tires separated from the wheels.
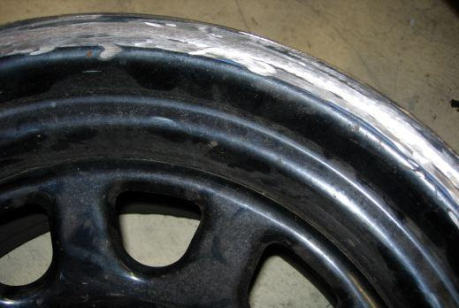
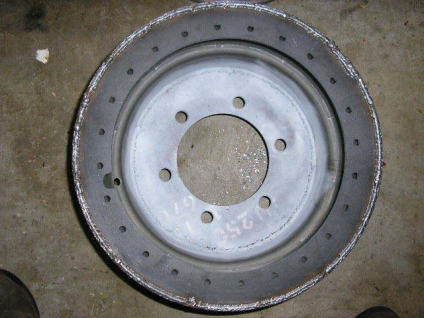
The next step was to clean the rim up in preparation for welding. Now spend a little time here because if the weld is corrupted with old paint, chances are it will leak, which of course, is a bad thing. I ground all the paint off the outer lip and around the outer edge to ensure a clean weld.

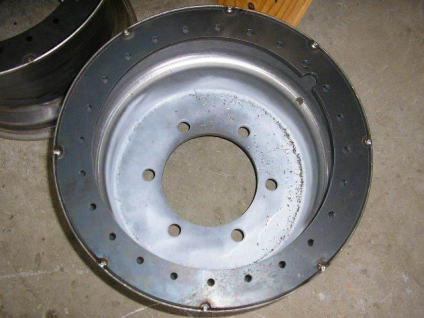
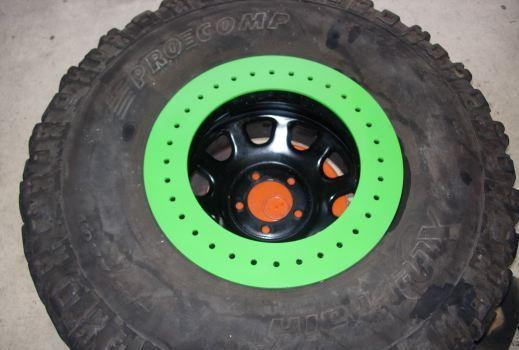
Next, set the inner beadlock ring into the wheel and get it positioned. The only real concern is lining up the cutout for the valve stem and getting the inner ring sitting in the middle of the rim. Because of the way the rim curves inward the inner ring should sit almost perfectly centered, if you need to jam something in between the ring and the rim, a handful of 3/16 pop rivets fit nicely and centre the ring. Then tack it in place with a couple of welds, on opposite sides of the wheel to keep the ring centered.
Once its tacked in, go ahead and weld it up. take your time because you really don't want it to leak. Make sure to overlap the tacks and any time you stop welding to help prevent this.
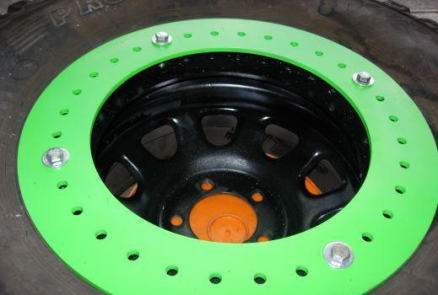
After going around and finishing the weld, go back over and check for any pinholes or gaps that might leak air and fill them. I also ground down the outer lip to make sure the tire would go back on easily. I would clean up the weld a little with a grinder, it doesn’t need to be perfect but you don’t want too many dags on the inside of the tire. Fit the anti coning ring (flat bar that sits on top of the inner ring around the inner edge) Weld this on both sides with some good stitch welds (weld about 20mm every 100mm say) doesn’t have to be perfect as this bit doesn’t hold air. Make sure your welds don’t interfere with the bolt holes. (not shown in pics)
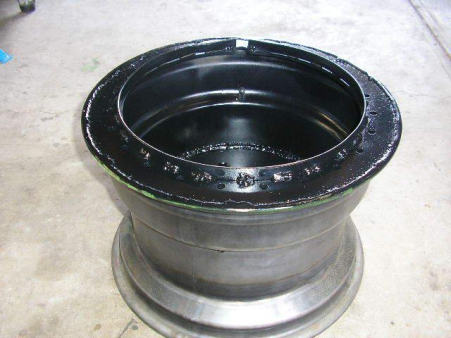
Once that’s done, to be extra sure it won't leak, I got some clear RTV silicone or black sikkaflex and smeared a healthy dose all around the rim along the weld bead. most of it will rub off when you mount the tire, but any holes or gaps will stay plugged.
.jpg)
After that cures a bit, prime and paint your new beadlocked rims to prevent rust and protect the weld.
Once the paint dries, its time to assemble the wheel. start with mounting just the back bead of the tire. i found some soapy water and a bit of leverage popped it right on. you won't be able to seat the bead until you get the beadlock bolted together.
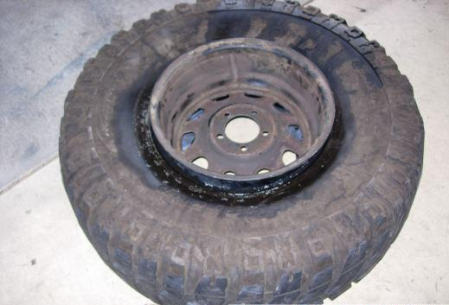
Once you have the tire on, I found it helpful to flip it over and set the rim up on a 20l drum flipped over. puts the tire at a good height to work sitting down, and helps you center the tire. this is important. you need to make sure the tire is centered in the beadlock ring when you start to clamp it down.
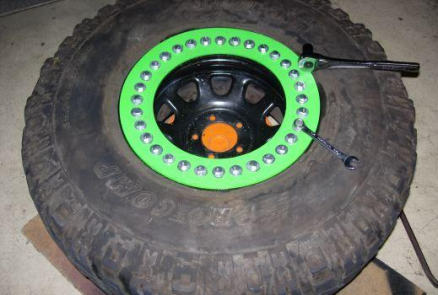
Now, on tires with thick sidewalls (such as swampers and creepys) it will be necessary to use longer bolts to get the ring started. I put 4 m8 x75 long bolts in at four corners to start clamping down the ring.
Once the four starter bolts are in and clamped down a bit, Go ahead and go around the ring and slide the other bolts thru, this will help keep the rings aligned when you start clamping them down enough to get the nuts and lock washers on.
Now the fun part, once you get all the bolts in and get nuts on them (pull the four starters and replace them as you can) go around a couple of times and torque all 24 bolts to 15 ft lbs
Once that’s all said and done, you can seat the back bead. Methods vary, then put air in it and check for leaks.
Congratulations, you're done!
Do you're absolute best to make sure it won't leak BEFORE you assemble the tire to the wheel! After this if they still leak, you can used that goo in a can puncture repair stuff to seal any pinholes.
Happy Wheeling!